Wednesday, November 21, 2018

Test Ride Tuesday - The Liv Pique 2

The first thing I have to say about this bike is that the only limits I had were my own lack of technical skills haha, that aside this bike was AWESOME!

Welcome to the Liv Pique 2

The Pique 2 is Liv's entry level dual suspension XC mountain bike with 27.5" tires and 120mm of travel both front and rear suspension.

Wait...what did you just say?

Mountain bikes, well really bikes in general have a lot of confusing terms, categories, and fads. Let's clean up a few of those now before we dig into this bike!

Entry Level - for a beginner, someone that doesn't plan on doing big competitions (yet) or someone that wants "a little bit of everything" with a new bike. Someone who is interested in a sport but not sure where they fall or how much time they want to commit to a new skill. Usually the cheaper of the models.

Dual Suspension - There is a shock on the front and middle/rear of the bike making it bouncy and springy. Two suspended parts = more capability for down hill and big riding. One (hardtail) = better for gravel, uphill, and speed. Both make rough and bumpy down hill descents easier as well as tackling some bigger features like rocks and roots. When you see a number like 120mm that is the distance of travel your suspension has. A smaller number is better for flat land, uphill, and less rugged terrain. The bigger the number the better for downhill, big rocks and logs, big jumps, and yes...all the better to send it.

XC- or Cross country riding. Full of climbs as well as descents. Usually involves more endurance type riding, twisty single track, lots of hills, and smaller features but can be a mix of more technical riding.

Tire Size - This bike has a 27.5" wheel, meaning how big around the wheel is it is kindof a vague term so bear with me here. Some other common wheel sizes in mountain biking are 26" and 29er

So now that we know a thing or two let's talk about how these features work with the Pique 2.

For my ride I chose Big Sioux Rec area. I would consider that a pretty true cross country type of trail. Lot's of flat area to up your speed, a great "hefty" and technical climb over some smaller roots and rocks, and then a nice open descent to the start. It is a bit over two miles for one loop but the down hill serves a nice recovery to go back for round two.

The 27.5" wheel was a great choice for this bike. I am 5'5" and it was extremely easy for me to stand over this bike. Hop off and on when I had to push the bike, and brought my center of gravity lower for better handling and balance on the tighter corners and down hill. I didn't feel like a sacrificed speed on the flats by having a smaller wheel either. The fact that I had a larger front chain ring helped me pick up speed where I needed it. The Maxxis High Roller tires offered great cornering security as I came around some of the softer dryer dirt and leaves on the uphill. The fact that this bike is tubeless (sealant instead of traditional tube inside) allowed me to run a lower tire pressure so that tread really grabbed the ground under me. I felt a lot more confident that usual riding in the dark.

The front forks 120mm suspension was just enough for this type of trail. The trails were riddled with horse tracks and this bike just flew over them like nothing. I hopped from bumpy to smooth parts over and over and didn't feel like I was underserved at all. With the lock out I didn't feel like any energy was wasted on the climb either. The bikes geometry pushed me up towards the front on those steeper climbs and felt great control even over the leaves and rocks. The only thing lacking on this bike is a lock out for the rear shock, but as a beginner bike it does not come with one.

The descent for me was probably the scariest. I am in fact a beginner mountain biker and that was the longest and steepest down hill I have done thus far. Honestly the dropper post saved my life. It allowed the saddle to be out of my way so I could really pushy my body back and down over my rear wheel, locking my balance in place and letting the bike roll under me. It was EXHILIRATING!

I hit the summit right at sundown and the view was gorgeous. This ride was fun and challenging and absolutely stunning. For me this wasn't about riding mountain bike, it was about testing my own skills and being brave, this bike absolutely helped me do that! Ten out of ten would recommend this bike to anyone looking to get into single track riding!


Wednesday, November 14, 2018

Test Ride Tuesday - The Giant Anthem Advanced 1

Giant categorizes the Anthem Advanced 1 as a “Cross Country Trail” mountain bike, which basically means it’s one of those does-it-all kind of mountain bikes. And after riding the bike a number of times on different trails and terrain, I have to agree. Now it may not be a weight-weenie hardtail built for 9 hour climbing-heavy races like the Leadville Trail 100, or a full blown World Cup downhill rig with a dual crown fork and 200mm of travel, but for pretty much anything in between the Giant Anthem Advanced 1 is ready to take on the challenge and give you the ultimate ride experience you’ve been waiting for.
My first ride on the Anthem Adv 1 was during a weekend trip down to Bentonville, AR (side note, if you haven’t been to Arkansas for a mountain bike trip YOU HAVE TO GO, like tomorrow) and from the moment I threw my leg over it I knew the bike was going to be a blast to ride. All of the trails in and around Bentonville are purpose-built mountain bike trails so they’re designed to be ridden hard and fast and the Anthem didn’t skip a single beat no matter what I threw at it. Steep rooted climbs, fast flowy berms, chunky technical descents, even some double ups at the in-town pump track this bike rode everything like a dream.
The carbon fiber main triangle of the Anthem Adv 1 gives the bike a stiff platform for responsive ride feel while increasing the vibration compliance and reducing the overall weight of the bikes (around 25lb totally stock with pedals). The front (Fox 34 130mm) and rear (Fox Float 110mm) suspension have 3 different independently controlled lock-out positions: fully locked out for smooth climbing sections, midway for bumpier more technical climbing or flat sections, and fully opened for the long descents. The Anthem Adv 1 also comes stock with a dropper post for those “party on Wayne” moments! To keep the weight down and improve ride quality, Giant equips the bike with carbon 27.5” wheels which if you’ve never ridden a bike with carbon hoops you’re really missing out. To round out the distinct features of this bike that contribute to its all-arounder characteristics is the SRAM NX 1x12 drivetrain giving you the top end gearing you need for high speed descents and paved riding as well as ultra-low end gearing for those gut wrenching steep descents where you need all the help you can get.
So whether you live here in Sioux Falls and primarily ride the mellow, XC oriented local trails at Leader’s Park, Tuthill, Yankton Trails, Big Sioux Rec, etc. or you have a cabin in The Hills and ride more rugged, rocky, hilly terrain requiring a bike allows you to pedal efficiently uphill for long periods of time and then descend at high speeds with confidence, the Giant Anthem Advanced 1 is equipped for the job. Don’t believe me? Drop by Spoke-n-Sport today to take one out for a test spin and experience this great bike for yourself.

Tuesday, November 13, 2018

E-Bikes...are those online deals worth it?

E-Bikes are you going to buy one online? Here's a few things to think about.

The picture posted is of some specs I found online through a simple search. Looks like a great deal but consider the following.
  • Who's going to assemble it? Your cost to have a bike built could be $100 - $150. You never know what's in the box.
  • Who's going to service it? Many e-bike companies are not based in the USA. Most of the bargain e-bike companies are based in Europe or Asia. That means slow service...if any service. Our brands are based in the USA and have service facilities in Sioux Falls.....that's right Spoke-n-Sport services the products we sell.
  • It has a Hub Motor. Hub motors aren't necessarily bad but they do tend to be very heavy and can suffer from overheating. This one has a Bafang. We actually kind of like Bafang. We use them for our e-bike conversion kits.
  • One size. If you really want to enjoy your bike ride, you'll want a bike that fits you. You can't fit a "one size fits most" to heights that range from 5'4" - 6'2". That's like buying one pair of shoes to fit your child from 5th grade to 12th grade.
  • 66.5 lbs!! Yikes.
  • What's missing? What "CLASS" is this bike? You should probably know because the not all classes of e-bikes are allowed in all areas of the city.

If you have questions about E-Bikes for the holidays or next summer....swing on in to Spoke-n-Sport and let's get you set up before the tariffs kick up those prices on Jan 1st. We also have 18 Month financing on all ebikes for the holidays


Wednesday, November 7, 2018

Test Ride Tuesday - The Giant TCX Advanced Pro 2


The TCX is Giants cyclocross race bike. Cyclocross is a Fall/Winter cycling discipline that features bikes that look fairly similar to a road bike, but the majority of the course is off-road. Courses feature lots of twisty corners, short punchy climbs, steep descents, stairs, a sand pit or two. Today I will take the TCX to our local Cross course over at Elmwood park and ride it around the course we used for Falls Area Bicyclists Elmwood Forest Cross a couple weeks ago.

The Giant TCX Advanced Pro 2 is an awesome build for a cross bike featuring a single chainring up front and a wide range 11-36 cassette in the back. While the TCX may look like a road bike it has quite a few differences. The riding position is shorter and higher up, favoring the ability to shift your weight around to increase handling over optimal pedaling from the saddle and aerodynamics. Part of the height is also a slightly raised bottom bracket, the joint where the crankset and pedals turn.This allows a little more clearance from the ground while cornering hard or on off-camber turns. Another major difference is the tires, they are wider at 33mm as opposed to 23-28 for road bike and have some knobby tread on them for grip off-road.

Tire pressure is another place cross differs from road bikes, Today I will be running 22psi front and 23 rear. The lower tire pressure has been proven more effective on rougher surfaces, even on roads a lower pressure will offer better rolling resistance, for road bikes this is the difference between 80 and 100 psi. In cyclocross the tires are larger and often the ground is rougher so the more of the bumps the tires can absorb the less I will have to while I’m riding. Lower pressures also offer increased traction by allowing more of the tire to touch the ground and also the deforming of the tire over bumps allows the tire to maintain contact with the ground

It is low 60s high 50s today so I will be wearing my sweet Spoke-n-Sport kit and a lightweight base layer. Grab my helmet, gloves and bike computer and head for the door. For shoes I use clipless pedals that have a cleat on the bottom of the shoe that hooks into the pedal. I also have some toe spikes on my shoes which are common for cyclocross and mountain biking. They increase grip while running up hills particularly in wet sloppy conditions.

Upon arriving at Elmwood I jumped right onto the course, the TCX handled consistently through every corner whether on grass or dirt as well as leaves covering the the park. I tried a couple of mock starts in to see how the TCX handles a sudden quick acceleration from zero. The bike rolls off the line quite well I had no issues getting into a good power position out of the saddle while still keeping the rear wheel in contact with the ground. Then into a wide sweeping left hand corner which I didn’t have to brake at all for and immediately into some heavy braking for the main section of tight twisty corners. The TCX handled cornering while braking consistently and confidently. Off camber corners are tricky because the ground is sloped away, and so as a rider enters the corner the ground is effectively falling away from the front tire that the rider needs to be gripping the ground, as well as the ground is higher on the inside of the corner limiting the amount the rider can lean their bike. The higher bottom bracket on the TCX helped significantly with this scenario.

The Elmwood race course featured a corner in the sand pit which I had a lot of fun riding on the TCX. The sand increases the resistance and so no matter how fast you go you will never coast through it. Also, if you turn your front wheel left or right it significantly increase the resistance further because it is now wider and pushes more sand. If you turn too far the front wheel will dig down into the sand opposite the direction you want to turn and then it will just stop once it is buried far enough and you will fly over the bars, but don’t worry there is a nice soft sand pit to land in. So with all the challenges of sand pits come a couple cyclocross skills, one is the balance between pedaling power pedaling smoothness and weight position, the other is very fine precise choice of the line your tires roll on. Cue epic video of sand flying everywhere and bike going fast.

Next of the course is the stairs, yes stairs. Dismount your bike, pick it up carry it up a short flight of stairs and remount at the top, all as fast as you possibly can. There is a technique to dismounting and remounting, dismounting being generally much easier than remounting. The TCX is nice and light and the top tube is small enough that I can easily reach my whole hand around it to pick it up. This set of stairs is short enough that I just hold the bike with my left hand still on the handlebar and my right hand on the top tube and then remount at the top.

Then I finished up my ride by riding the rest of the way around our beautiful bike trail and back home setting a few PRs on the east side of the trail with the tail wind. I ended with 30 miles and 2.5 hours elapsed 2 hours moving. Back home to change clothes and then clean the bike off and get it ready for whichever one of you lucky people gets to ride it next. It is available for rent through our rental system. Thank you!

Wednesday, October 31, 2018

Test Ride Tuesday - The Liv Langma Advanced 1 Disc


Hey Everyone,

If you didn’t catch our social media post and live story, we have a few very special bikes for demo and are taking you along for the test ride. Every Tuesday for the next four weeks we will have something new highlighted so make sure you check it out!

That being said, let’s dive into our first one!


The Liv Langma Advanced 1 with disc brake was my first test ride. This bike is their performance race and climbing bike, so I figured forty miles with rolling hills and shoulder debris would be a good test on all of Liv’s claims. The Langma (which I learned is what Tibetans call Mount Everest) falls right in between the Avail, which is their endurance road bike, and the Envie/EnviLiv, which is their aero race bike. The Langma is the lightest between those two categories as well, using brand spanking new research to limit the amount of carbon sections to bond together and instead creating more full, complete parts of the bike. Less joining areas equals a stronger and stiffer bike without wasting energy on flexing carbon.

Some of the first things I encountered on my ride was how steady and controlled the bike was. There are a lot of cracks and seams in the road and bike trail around here and at 90 PSI I wasn’t shaken down to my bones. There is also a lot of rock and road debris along the shoulder heading out of Sioux Falls towards Baltic, and even hitting rock didn’t seem to shake the bike one bit. That to me was comforting because I often ride alone and generally on highway so the inevitable no longer felt like an issue or worry to me. At one point a prairie dog bolted from out of the grass right towards my wheel, some quick averting saved both of us and left me upright. This bike isn’t a bit touchy or jerky under quick corrections which made me feel confident that descending wouldn’t be an issue down the road (no pun intended).


The P-R2 wheelset on the bike bike is a carbon, disc, tubeless 700c x 25mm set up. Cornering, rocks, and climbing all felt extremely forgiving on our not so forgiving roads. The Ultegra shifters took little to no effort on some of the bigger climbs to keep my consistent cadence while shifting. The position you are put on on the bike is so comfortable for climbing too. I never once felt like I had to reach for a climb, as soon as I stood, my legs could work and my hands were just where they needed to be to keep me steady. I had no numbness in my hands the entire time, just very comfortable relaxed arms.

During the ride I have about a 10-15 mph head/crosswind. I didn’t feel tossed around or jittery on the long flats or going down hill and a lot of that comes from the smaller tubing on the bike. While it does have a few aero qualities, because of the frame design the tubes can be smaller and still stronger. I think an aero bike in this crosswind wouldn’t have been as enjoyable. I had mostly all tailwind on my way home and was hitting 24 mph without even realizing.

There are a few other models in this lineup as well. For those that like the rim braking capabilities you are covered. For those that are really climb focused, there is a Shimano Dura-Ace Di2 option just waiting for you to take it home.

10 out of 10 I would recommend this bike to someone competitive, youth triathlons, sprint triathlons, long supported tours, or anyone that just rides road bike that wants something responsive, lightweight, and efficient. It is safe to say that this was an extremely fun, reliable, and fast bike and would absolutely take it out again! Plus, you see bald eagles, what else could you want out of life?

Friday, August 17, 2018

Guest Post: Rugged Growler Recap by Adam


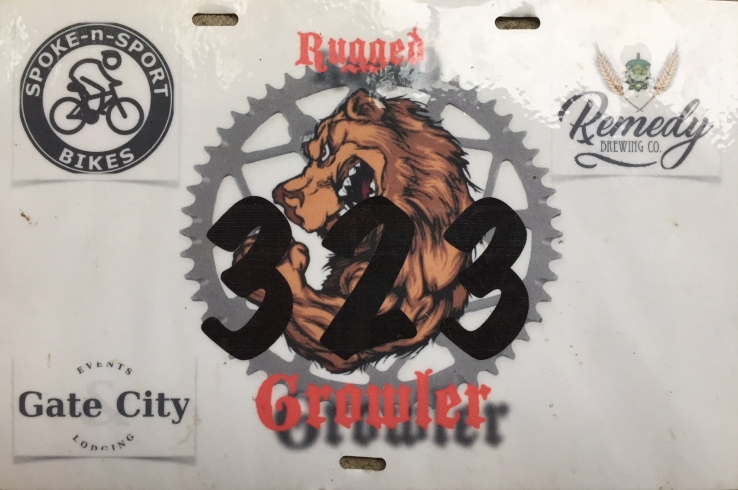
rg2018-race-plate.jpg

 Adam is one of our Retul Bike Fitters at Spoke-n-Sport.  Last week he survived the Rugged Growler with several co-workers.  Here is his recap of the Rugged Growler.
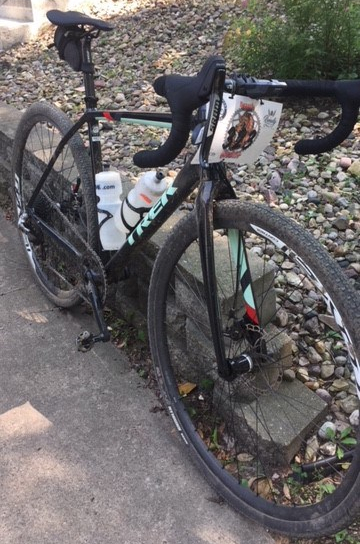
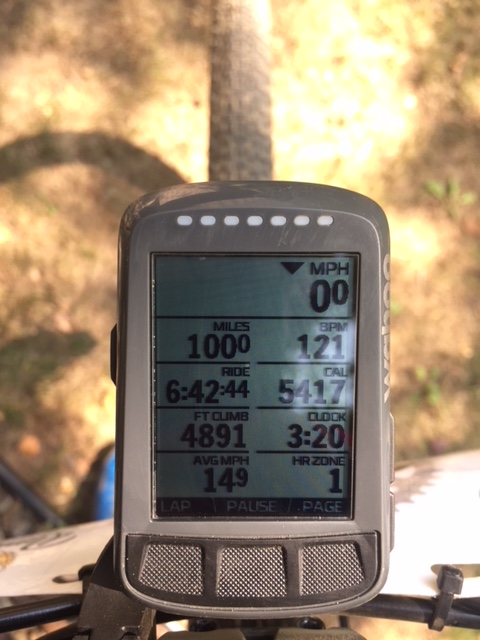
Leading up to the Rugged Growler, my preparation was much more procrastinated than usual. The race took place on a Sunday and I picked up my new bike, a 2018 Trek Crockett 5, from Spoke-n-Sport Brookings just 5 days earlier. Luckily it came mostly assembled, however, I needed to swap a few critical components which turned out to be more time consuming than hoped. That, combined with an insanely busy work week and a full blown training schedule in the days leading up to the race left me scrambling to complete the bike build until after midnight Friday night. Needless to say, I’d only ridden my new Crockett for a quick 15mi bike path ride with Ali and her uncle the day before the race which was just enough time on it to get the fit mostly dialed. Not ideal but I was stoked and ready to put some big miles on my new whip! Another violation to the “don’t try new things on race day” rule of thumb was using a new bike computer that I hadn’t even installed on my bike until the night before. My friend/ co-worker/ teammate lended me a Wahoo Elemnt Bolt to test out during the race for it’s improved navigation interface over my Garmin Edge 500. This turned out to be a critical piece of gear to help get me to the finish line, so thanks Alonzo! Now to race day.


Crockett 5 Maiden Voyage.JPG
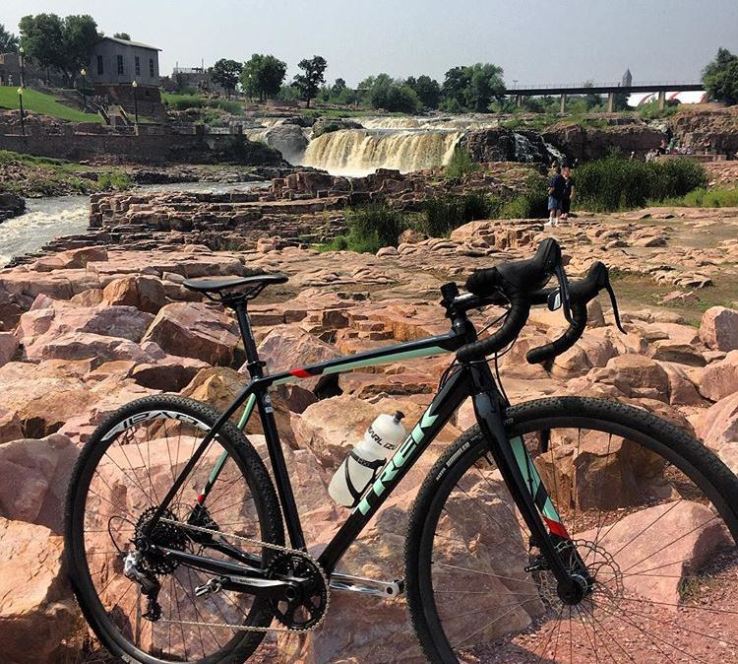
Trek Crockett 5 maiden voyage (Contact Spoke-n-Sport Brookings about getting one of your own!). PC: MEEE


Sunday morning’s wake up call came all too early but my energy was high. I ate my usual breakfast, a bagel with butter, honey, and some Untapped Maple Syrup. I packed a strawberry Pop-tart for the ride down as well to keep the solid food intake up early on. I decided to ride down to the race from home which turned out to be a perfect 1hr warmup and got me to the venue about 35min before race start. I filled up the H2O bottle I’d drank on the way down and hung out with other racers before it was time to toe the “line.”
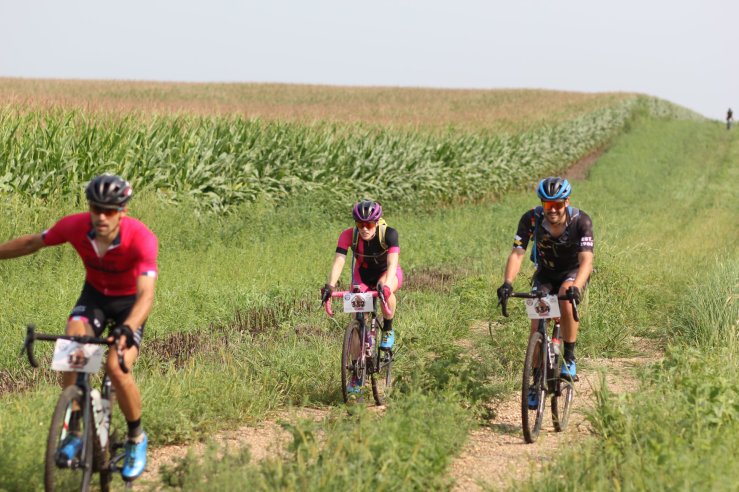
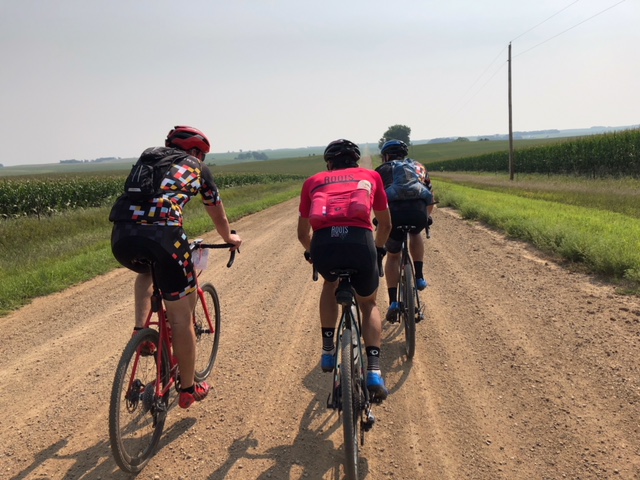
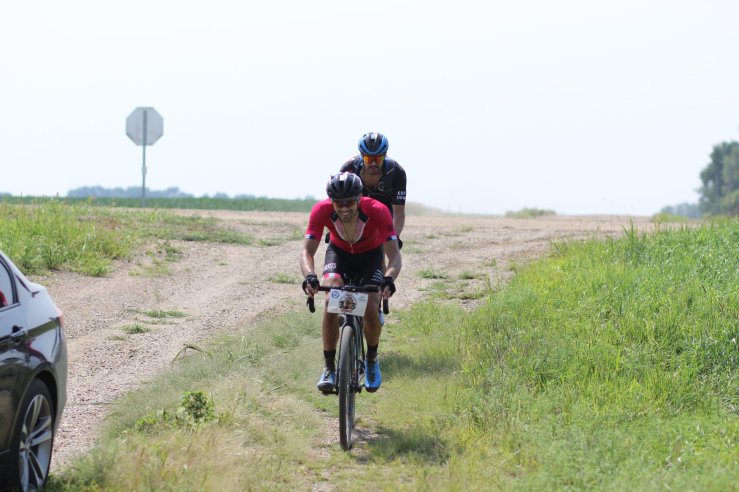
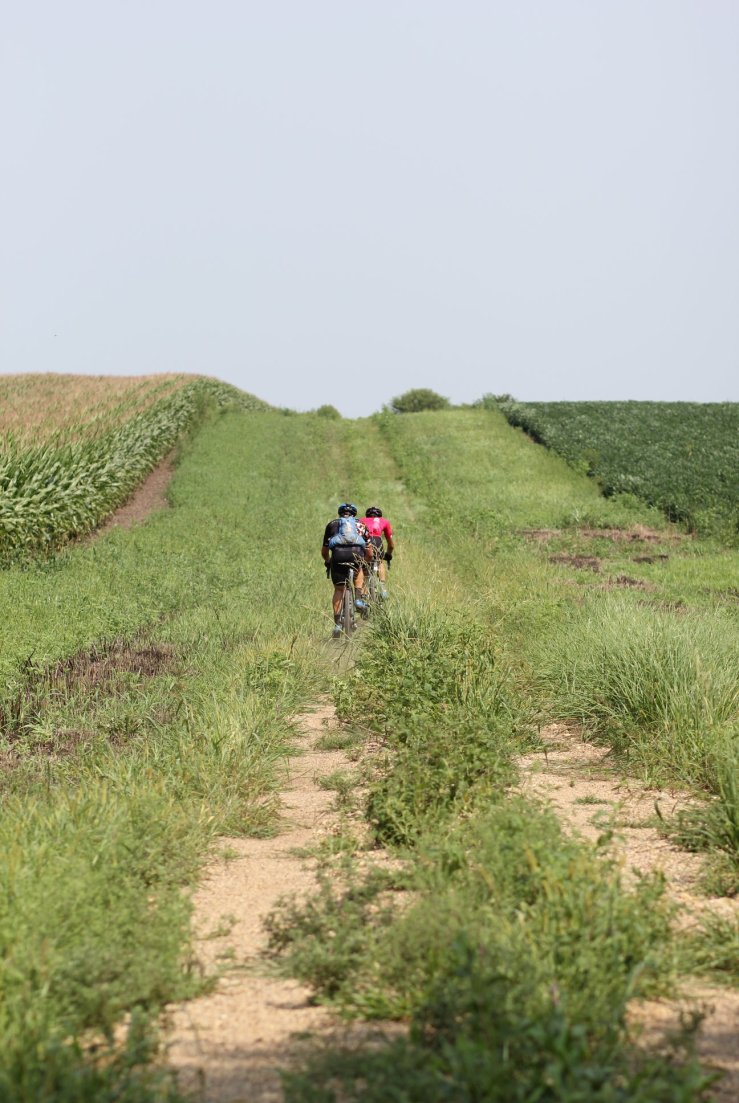
The race started promptly at 9am with a big group which stayed together until the first climb through Newton Hills. Alonzo went to the front because he knew the route the best. About 3/4 the way up I overtook so I could pick my own lines through the steeper sections. The decision to run 42×11-42 turned out to be key through these sections. After the climb the group was down to 4-5 of us. I stayed in front through the next descending section knowing I was a more confident descender (especially with the new Crockett!) and ended up blowing by a turn, having to back track to get back to the route. During that time, Peter and Alonzo passed me but I caught back on up the Newton Hills road climb. The three of us stayed together through the second lap around Newton Hills all the way through the super gnarly over-head grass hike-a-bike section (see image below).

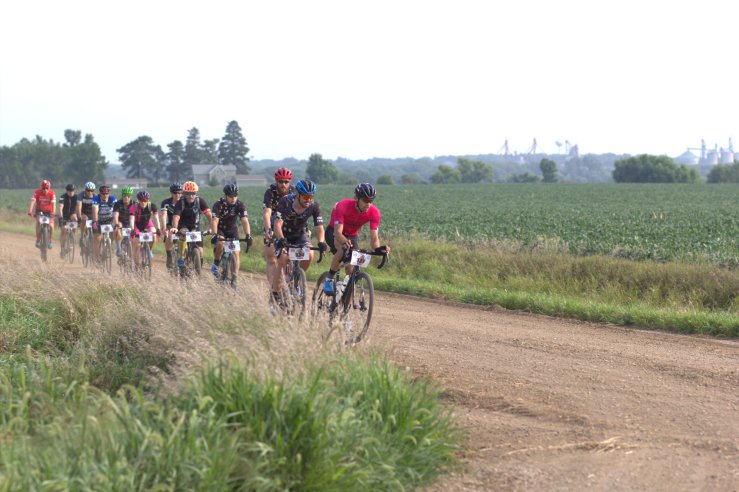
RG2018
Main group which stayed together until the Newton Hills horse trails. PC: Phil Melmer
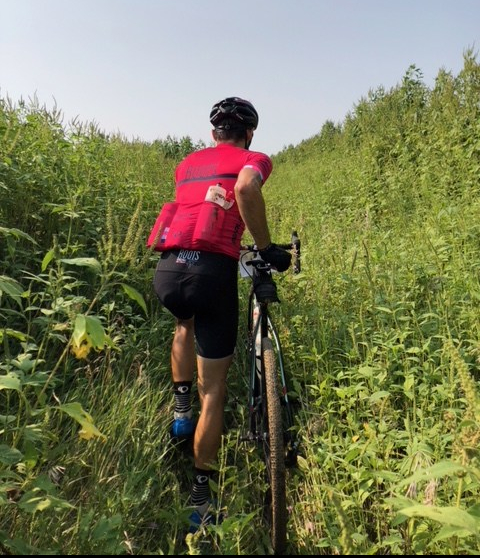
rg2018-tall-grass.jpg
This was after the roughest part which was way over our heads. The whole section was about a mile in length and took over 15min. PC: Alonzo Christensen


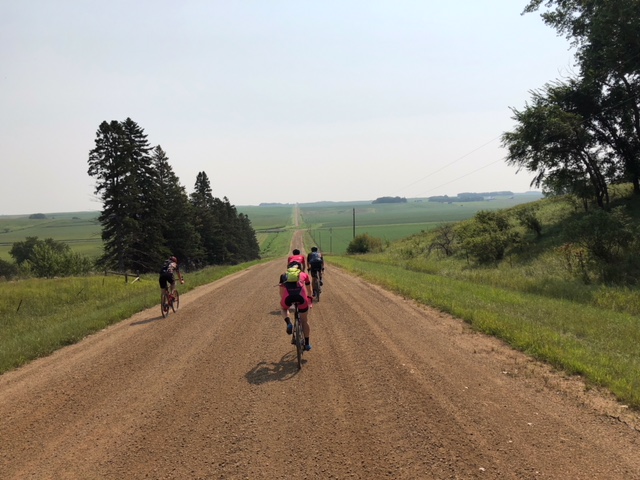
After the hike-a-bike we latched onto another group of riders who missed some turns early on and ended up ahead of us so we stayed together for a while. This made for some fun interactions as we rolled through the first “feed zone” where the race coordinator, Jamie Kolvek and a few others had ice cold beer hand ups ripe for the taking. I snagged one and took a few sips before handing it over to the other riders in the group (#crossiscoming folks!). One rider was still out front so we decided to form a paceline to catch him on some of the Southbound gravel sections into the headwind. After catching the rider out front we came to a stretch of no-maintenance road that had some technical descending sections. I went to the front for this section to choose my lines and open up a brief gap which allowed me some brief recovery.


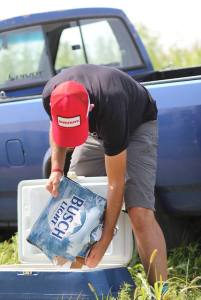
RG2018 Feed Zone
Crew members stocking the “feed zone”.  PC: Phil Melmer


RG2018 Group (3).jpg
Getting my beer handup practice on. PC: Phil Melmer
RG2018 Group
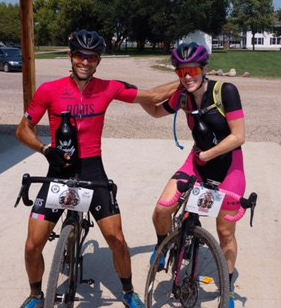
Small group of 5 that formed consisting of 4 Spoke-n-Sport employees and 4 Parallel 44 p/b Sanford Power teammates (kits coming). PC: Alonzo Christensen


RG2018 Group (2)
Before splitting. PC: Alonzo Christensen


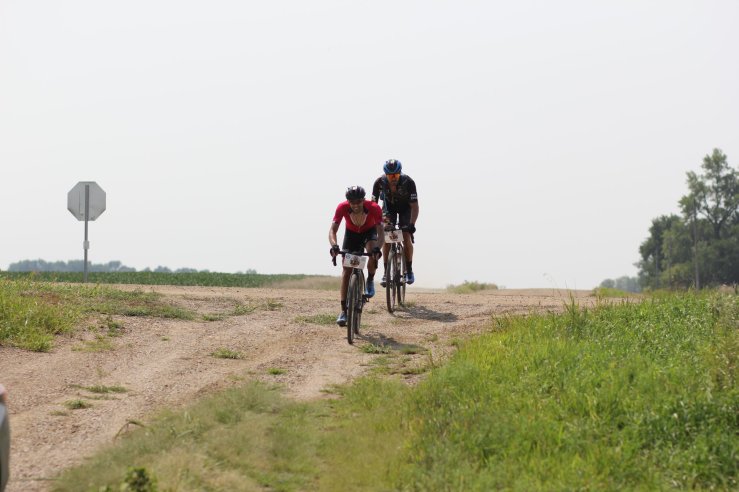
Shortly after this stretch of B-road, Peter and I began to form a gap on the rest of the group and decided to carry onward with just us two. Peter and I stayed together all the way to Newton Hills, trading pulls and just having a good time. Having only brought 4 bottles and estimating a finish time of around 4 hours, I was getting concerned about my hydration after being out in the open sun through all of the gravel sections. Thankfully, we passed a Church around mile 40 which gave me the opportunity to refill my bottles. Wanting to be quick I only filled 3, hoping that would be enough fluids to take me to the finish. Peter was courteous enough to sit up while I made my pit stop, not having to make on of his own since he opted for a Camelbak instead. By this point we knew we were putting enough time in on the rest of the field that we shouldn’t have a problem staying away once we reached Newton Hills.


RG2018 OTF
Peter and I leading through the “feed zone” on the way in. PC: Phil Melmer
RG2018 OTF (4)
By this point we both bypassed the beer handups. PC: Phil Melmer
RG2018 OTF (2)
Onward to the thick stuff. PC: Phil Melmer


Upon entering the park, we were to complete two paved  loops around the park, each of which ended with a 3/4mi climb that pitched upwards of 20%. The first time through the park we stayed together but Peter mentioned some cramping on the  the climb. During the final climb of the second road loop I was feeling good still so I opened a gap and was able to attack over the top heading into the final road descent. Knowing I had slightly larger gearing than Peter I pushed hard through the road descent into the final section of single track through Newton Hills.
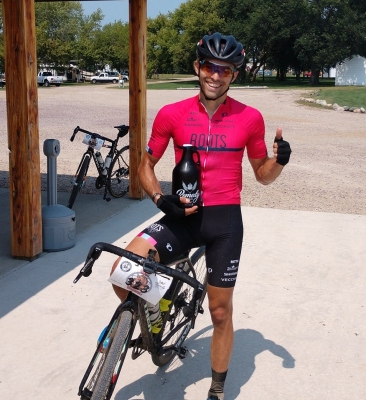
My legs were feeling great so I ate my second to last gel then put in a hard effort up the first dirt climb and I knew Peter was suffering cramping so I felt confident with my lead at this point. I then ripped the techy descents, having so much fun pushing my new Crockett to the limit. Riding a solid tempo up the final dirt climb in Newton Hills I was feeling great and knew I just needed to make it through the last singletrack descent in one piece then it would be smooth sailing to the finish. Coming out of Newton Hills I downed my last gel and finished off the rest of my chews to prevent any bonking heading to the finish. One more road climb then a few miles of gravel later I reached the finish with a comfortable lead over Peter, claiming this years Rugged Growler title!
What an awesome event and one of my favorite days ever on the bike. Huge thanks to everyone who helped put on the Rugged Growler, Remedy Brewing for providing the growler prizes, Spoke-n-Sport Bikes for getting me on my new bike, Tifosi Optics for keeping my eyes shaded and protected, Pearl Izumi for the softgoods support, Giro for keeping my brain safe and feet comfortable, and UnTapped Maple and Skratch Labs for keeping me fueled for 4 hours on the bike. Stoked to land another top step for Roots Racing and looking forward to next years event already!

P44 p/b Sanford Power top step sweep. PC: Jamie Kolvek


RG2018 Bike
I sure put my new steed through the ringer during this one. PC: MEEE

Bike Setup:
Frame: Trek Crockett 5 54cm
Drivetrain: SRAM Rival 1 Mechanical Disc
Chainring/ Cassette: 42T x 11-42
Wheels: Roval Control Carbon
Tires: Maxxis Rambler 38mm (35F, 36R)
Saddle: Fabric Scoop Flat 142
Computer: Wahoo Elemnt (thanks Alonzo)
Weight: 21.4lbs
Gear:
Kit: Roots Racing Pearl Izumi Team Kit
Helmet: Giro Synthe
Shoes: Giro Empire VR90
Sunglasses: Tifosi Aliant (Best Sunglasses EVER)
Saddle bag: 1 20-25mm tube (for weight and size), 1 CO2/ valve, 1 tire lever, chain breaker, 11s powerlink
Fuel:
Food: 1 caffeinated Untapped waffle, 4 gels (1 caffeinated), 2 packs of high sodium chews (plus 1 bar and 1 pop tart on ride down, 1 bar after race, and 1 bar and pop tart on ride home)
Drink: Carried 4 bottles to start and drank one bottle of H2O on ride down. Started race with 3 bottles Skratch (2 frozen), 1 bottle H2O, refilled 3 bottles H2O at Church @ mile 40 of race (2:45min in), refilled 3 bottles H2O for ride home


RG2018 Recap
As Jackson Long says “Do Epic Shit!” PC: MEEE

Sunday, August 5, 2018

Andrew's Bikepacking Gear Choices

These are my favorite bits of bikepacking gear. A part of adventures is being prepared for lots of riding conditions. Another part of adventure is being comfortable while riding or relaxing at camp.

The whole team at Spoke-N-Sport can help you get your bike ready for a bikepacking trip. Stop in and get ready for adventures just around the corner.

Bike Components

Shimano Flat Pedal
Flat pedals with a grippy surface, so you can ride in just about any shoes -- from hiking shoes, sandals with white socks (fashion be damn'd), crocs, or mountain bike shoes with grippy rubber soles.

Personally, the Shimano GR500 flat pedal works well with my 11.5 shoe size using hiking shoes.

Ergon Grip
Handle bars with multiple hand positions, so your hands stay limber and comfortable while riding a few hours to camp.

While I use drop bars, I've always wanted to try Ergon grips for a flat bar MTB bike.


Comfortable saddle. Firm with a bit of flex or padding. A too soft of a saddle and you may get chaffing from the heat and friction. Once you find a saddle that fits your body, stick with it for the long haul.

The Brooks B-17 has been a staple of bicycle travel for over a 100 years. I'm on my third B17. The first two both have between 7-9k miles each. However, leather does require care, so I've wanted to try a Cambium series for all-weather durability and less maintenance.
Brooks Cambium

Bike Accessories

Bright headlights & tail lights -- with a rechargeable USB option, so you can recharge the light with a battery pack or phone charger. Light & Motion headlight and taillight packages will get you riding at night.

I really like the design of Light & Motion products, because the buttons work when wearing winter gloves. So far, I've ridden with these lights in lots of conditions and almost two years later the lights are sill work like new.
Light & Motion Commuter Lights

Knog Oi
Bell. Let people know you're riding around or behind a pedestrian or fellow cyclist on the trail. Ringing a bell is quite a bit more civilized than yelling "on your left". The Knog Oi fits your bars and doesn't take up to much handlebar real estate.

Take a listen to the tone, some are too brassy while others aren't loud enough. Get what sounds best to you.


Endura Shorts

Bike Clothing

Endura makes great baggy shorts, knickers (aka 3/4 pants). Pockets for days!!! Keep you phone, wallet, keys, mini-pump ready for quick access with Endura's well designed pockets. The liners are thin, but durable (6th year on my current liners). While your mileage may vary, these are durable clothing that work great for lots of riding conditions -- urban, gravel, trail.

Lastly, snap-style western shirts are great for bike adventures and camping, because you can release a snap mid-ride to cool off.


Wednesday, June 20, 2018

Let's Go Bikepacking


What is bikepacking?

A lightweight form of bicycle touring, that includes camping, typically riding gravel roads or other form of mixed-terrain routes are included (gravel roads, singletrack, doubletrack, minimal maintenance roads). Camping gear and food is carried on your bike via light weight bags or rack and panniers.

What is a s24O?

Grant Petersen popularized the idea of a Sub 24 hour overnight (S24O) bike camping trip in the 90s as way to have a quick adventure that doesn't require lots of planning. Minimal planning is involved, as opposed to longer tours that require coordination.

Ride out to camp after work on a Friday night, camp, and return home the next day around noon. You'll have plenty of time for the rest of the weekend.

Your first few S24Os are great practice for longer rides, more days and nights. Get good at riding with gear and you'll be ready to start dreaming about multiple day bikepacking trips.

Why go bikepacking?

Palisades State Park
Bikepacking and S24Os are a great way to experience a microadventure close to home without having to take vacation time, leave your friends or family.

Escaping the grind for a day can reinvigorate the soul, ignite a passion, and unplug from the 24-7 interwebz data cycle.

Adventure is just around the corner. Adventure by bike is a great way to see the world, go camping, explore a new road, and eat at a local cafe.

What do I need for a bikepacking S240 trip?

  1. Bike that can handle the route -- burly-fat tires for gravel, skinny-fat for pavement, medium-fat for both
  2. Bike repair kit -- tube, patch, pump, tire levers, chain breaker, 4-5-6 hex wrenches, bike multi-tool/pocket knife
  3. Camping gear -- tent, sleeping bag, sleeping pad, knife, tooth brush, toiletries kit, head light, book, deck of cards, extra set of clothing for camp, camp stove(s) for hot food and drinks
  4. Food for dinner/lunch/2nd breakfast/1st lunch
  5. Plenty of water (3 to 5 bottles) water bottles are needed for long rides
Lastly, you need a sense of humor and adventure. One night in the cold/heat/a rowdy camp site won't kill you, and will give you a great story to tell your Momma. You'll be home in a few hours ready for your comfortable bed or sofa.

What kind of bike do I need for bikepacking?

The best bikepacking bike is the bike you already have. A sturdy hardtail mountain bike will work, so will a bike path hybrid, or drop-bar road bike with big tires -- 32mm. As your riding progresses, your needs may change. If they do, then here's five considerations for a "bikepacking" bike:
  1. What kind of handle bars do you like -- drop or flat?
  2. Do you want to travel fast and light or do you want to roll over anything?
  3. Do you want an all-rounder that's good at lots of things, but not perfect for some types of riding or bike perfect for some types of riding?
  4. How long do you want to ride -- miles, hours, days?
  5. How much weight do you need to carry?

Here's a few bikes I like for bikepacking

2018 Salsa Fargo 27.5+

  1. Salsa Fargo - drop bar adventure
  2. Salsa Cutthroat - lighter & nimble Fargo
  3. Salsa Marrakesh - traditional pavement touring bike
  4. Soma Juice -- hardtail mountain bike
  5. Soma Saga - pavement-centric touring bike


How do I carry my camping gear on my bike?

Options are as diverse as a bikes. Here's a few options that work well:
  • speciality velcro dry bags strapped to handlebars and seatposts aka Bikepacking bags
  • Racks and panniers
  • backpacks
  • trailers
Work with what you have, maybe that will work for a few trips, before you decide to go bikepacking again as your riding changes.

Bikepacking bags

Salsa EXP Series Seatpack
Bikepacking bags are designed to fit to various points on the bike and not affect the bike's handling. This is useful when riding on challenging terrain or when it's spirited ride.
Frame bags, seat bags, and handle bar bags are the core setup for bikepacking.

Seatbags work great for storing clothing, sleeping bags, and soft items.

Heavy items like camp stove(s) should go in the frame bag, lighter items in the handlebar and seat bags.

Accessory bags are great for carrying snacks, tools, and random items that may need access while riding. Top tube, seat tube, and stem sacks are all great additions to any bike travel kit.

Racks and Panniers

Racks and panniers work because you may already have a rack installed on your bike. Panniers can work for bike commuting, touring, shopping; however, racks may become loose on gravel roads. Applying blue locktite to the threads should keep the bolts from coming loose. Bringing a spare bolt or two is good insurance if a bolt shakes loose and your rack needs another bolt on the ride.


Salsa Wanderlust Rack


Panniers offer a lot of storage capacity, which allows you to pack everything in a few bags. Panniers are also great for riders with small frames, because they don't interfere with the rear tire. Pack the heavy items first in the bottom and then put lighter items like clothing towards the top of the panniers.
Some racks work better than others due to bicycle standards.
Salsa Touring Panniers

Check your bike and see what will offer the balance between load, fit, and capacity. Racks that attach at the wheels are very stout and are a great option for gravel riding. Plus, racks work great for carrying large bulky items -- like firewood, beer/cider, cast iron skillets. Racks that attach at the hub are the strongest and work great for single track.

Truck bags are a lot lighter option than panniers, but you may not have enough storage space to carry all of your gear. One solution is to use a trunk bag and panniers to carry everything you need maybe some gear you don't need.

Baskets are the newest trend in bikepacking with racks. Baskets on your bike work the same as your basket at HyVee. Dump everything in and sort it out when you get to camp.

Backpacks

Riding with a backpack is great way to get started bike adventures. Put your gear on your back and get riding. One drawback you might encounter is a sore back after a day of riding with weight on your back; personal fit, comfort, and fitness will tell you if you like weight on your back while riding.

Trailers

Using a bike trailer is a great option, because it doesn't require adding a rack on your bike to go camping. Attach your trailer to your bike and put your gear in the bin. While I don't have personal trailer experience, the general consensus is that a trailer does affect the bike's stopping and handling capabilities.

What don't I need for a bikepacking trip?

You don't need the following items, but I like to be comfortable after a day of riding. Here's a few luxuries:
  1. Camp chair
  2. Two sleeping pads (foam and air)
  3. Camp sandals
  4. Multiple camp stoves for different types of cooking
  5. Speaker for music
  6. Hot dog & S'more skewers
  7. Multiple cooking pots and a titanium plate
  8. Journal
  9. Frisbee/flying disc
  10. Fishing pole

Where should I go bikepacking?

S240 bikepacking adventures are close quick adventures that can be planned Wednesday over your lunch break and you'll be ready to ride Saturday morning.
Here's a few options:
  1. Check local state parks for camp sites
  2. Check local city parks for camp sites
  3. Check local public nature areas for wild camping
  4. Check rails to trails for routes away from traffic
  5. Check the next town over for any bed and breakfasts or hotels to travel light
Use Google Maps to plan a route, web apps like Ride with GPS can help you share your route. Planning stops for water, food, and sightseeing is apart of the process. See what you want to see, if you can't fit it all in, plan another trip with a slightly different route.

Another option is to get a camp site and just go. Plan the route as you're riding. Stop when you need to stop, ride when you want to ride.

Try to see something new and not get too lost.

What every bikepacker really needs!

A burnt up sock is the most versatile camp gear you never knew you needed... until now. Behold, the best camp stove potholder known on the Big Sioux River.

The Legend, The Myth, the Burnt up Sock!!!
How do I get such an important camp accessory? 

Easy! Follow these 10 steps and you'll have your own legend ready for adventures.
  1. Go bikepacking
  2. Go bikepacking in the rain
  3. Start a camp fire
  4. Dry off your socks, wool cycling cap, goat leather gloves, etc over the fire
  5. Leave items on the fire too long
  6. Wait until items are smoking (visual conformation required if items are not on fire)
  7. Extinguish any fires
  8. Remove any ashes
  9. Remove loose threads
  10. Put in your outside coffee kit, camp cooking kit, camp stove
Repeat steps 3-9 as needed until sock is rendered useless as a sock, but perfect as a potholder.